Ubuntu 下载加速
apt使用清华源
sudo vi /etc/apt/sources.list1
2
3
4
5
6
7
8
9
10
# 默认注释了源码镜像以提高 apt update 速度,如有需要可自行取消注释
deb https://mirrors.tuna.tsinghua.edu.cn/ubuntu/ xenial main     restricted universe multiverse
# deb-src https://mirrors.tuna.tsinghua.edu.cn/ubuntu/ xenial main restricted universe multiverse
deb https://mirrors.tuna.tsinghua.edu.cn/ubuntu/ xenial-updates main restricted universe multiverse
# deb-src https://mirrors.tuna.tsinghua.edu.cn/ubuntu/ xenial-updates main restricted universe multiverse
deb https://mirrors.tuna.tsinghua.edu.cn/ubuntu/ xenial-backports main restricted universe multiverse
# deb-src https://mirrors.tuna.tsinghua.edu.cn/ubuntu/ xenial-backports main restricted universe multiverse
deb https://mirrors.tuna.tsinghua.edu.cn/ubuntu/ xenial-security main restricted universe multiverse
# deb-src https://mirrors.tuna.tsinghua.edu.cn/ubuntu/ xenial-security main restricted universe multiverse
更新apt
1
2
sudo apt update
sudo apt upgrade1
2
3wget https://bootstrap.pypa.io/get-pip.py
sudo python get-pip.py
pip -V #查看pip版本1
2
3mkdir ~/.pip
cd ~/.pip
sudo gedit ~/.pip/pip.conf1
2
3
4[global]
index-url = http://pypi.douban.com/simple
[install]
trusted-host=pypi.douban.com1
sudo apt install git
1
2
nslookup github.global.ssl.fastly.Net
nslookup github.com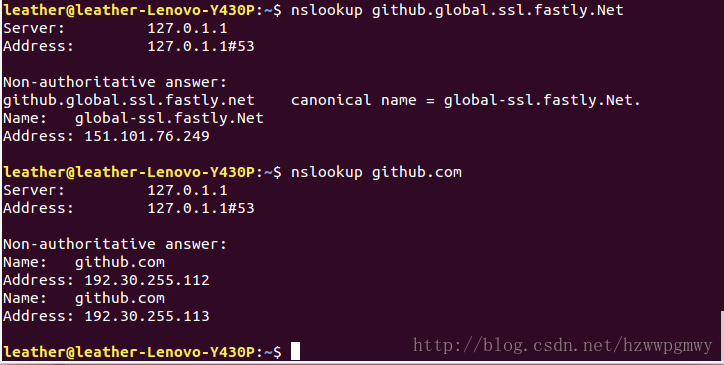
sudo vi /etc/hosts文件中 1
2151.101.76.249 http://global-ssl.fastly.net
192.30.255.113 http://github.com #此处112还是113根据自己的情况调整?1
sudo /etc/init.d/networking restart
1
git clone https://github.com/CMU-Perceptual-Computing-Lab/openpose
准备工作
安装Cmake GUI
1
sudo apt-get install cmake-qt-gui
安装OpenCV
1
sudo apt-get install libopencv-dev
安装Cafe
1
sudo bash ./ubuntu/install_cmake.sh
配置
- Open CMake GUI and select the OpenPose directory as project source
directory, and a non-existing or empty sub-directory
(e.g.,
build) where the Makefile files (Ubuntu) or Visual Studio solution (Windows) will be generated. Ifbuilddoes not exist, it will ask you whether to create it. PressYes.


- Press the
Configurebutton, keep the generator inUnix Makefile(Ubuntu) or set it toVisual Studio 14 2015 Win64(Windows), and pressFinish.


- If this step is successful, the
Configuring donetext will appear in the bottom box in the last line. Otherwise, some red text will appear in that same bottom box.


- Press the
Generatebutton and proceed to OpenPose Building. You can now close CMake.
Note: If you prefer to use your own custom Caffe or OpenCV versions, see Custom Caffe or Custom OpenCV respectively.